
Introduction:
Are you looking to optimize your internet connection for faster browsing and improved performance? In this tutorial, we will guide you through the process of configuring UDP Custom in the HTTP Custom app. UDP (User Datagram Protocol) allows for faster transmission of data packets, resulting in a smoother and more efficient connection. By following these steps, you'll be able to enhance your internet experience and enjoy seamless browsing. Let's get started!

Step 1: Watch the Previous Video or Post (Optional)
If you haven't watched or read our previous video on creating a UDP Custom account, we recommend checking it out first. It will provide you with a better understanding of the concepts and prerequisites for this tutorial.

Step 2: Download and Install HTTP Custom App
Head to the Play Store or Apple Store on your mobile device and search for the HTTP Custom app. Download and install it on your device.

Step 3: Launch the HTTP Custom App
Once the installation is complete, open the HTTP Custom app on your device. You will be greeted with the home screen.
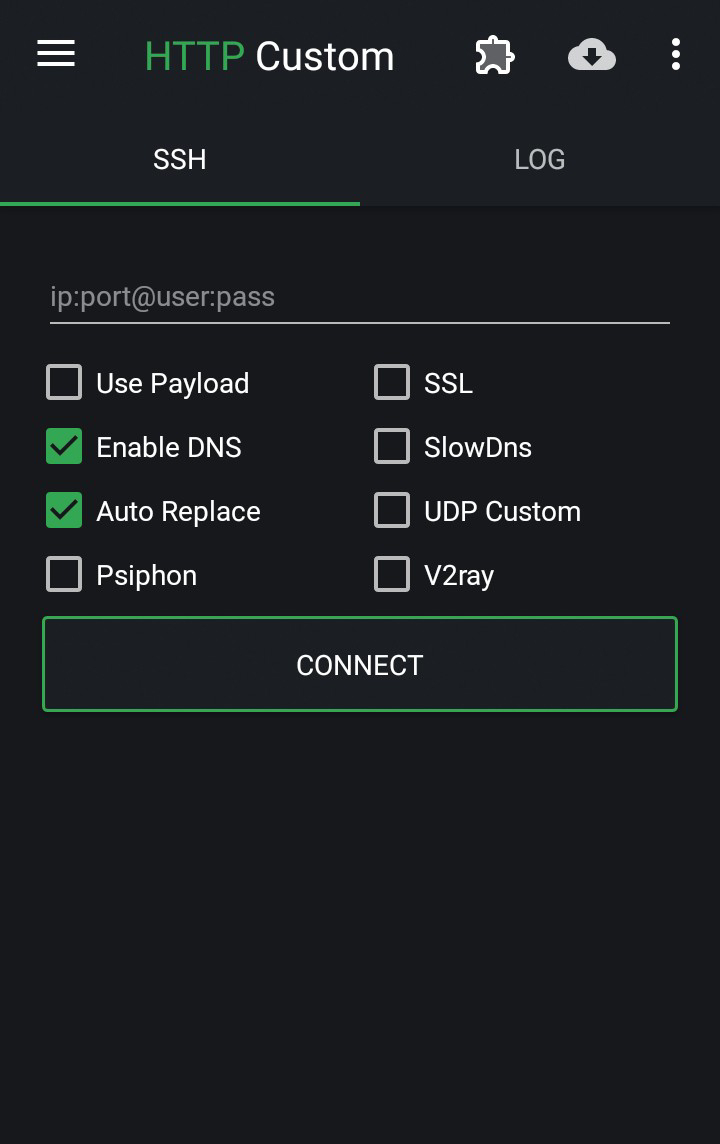
Step 4: Enable UDP Custom
On the home screen, locate the option to enable UDP Custom. Check the box next to UDP Custom to activate this feature.

Step 5: Copy Server Details
Retrieve the server details you created for the UDP Custom account. This includes the username and password. Copy these details as you will need them in the following steps.

Step 6: Configure UDP Custom Settings
Click on the plugin icon within the HTTP Custom app to access additional settings. From the list of options, choose UDP Tweak Settings. This will allow you to fine-tune your UDP configuration.

Step 7: Apply Tweak Settings
Follow the on-screen instructions to apply the recommended tweak settings for UDP. These settings are designed to optimize your connection for improved performance and stability.

Step 8: Edit Tweak Settings
Edit Tweak Settings as shown below you can Rx and Tx sze. This will establish the connection between the UDP Custom account and the HTTP Custom app.

Step 9: Additional Resources
For a more such tutorials on configuring HTTP Custom, be sure to visit our blog post on home page or visit YouTube channel. The link is provided in below. You'll find step-by-step instructions and helpful tips to further enhance your internet connection.
Conclusion:
By following these steps, you have successfully configured UDP Custom in the HTTP Custom app. Your internet connection should now be optimized for faster browsing and improved performance. Enjoy a seamless browsing experience with enhanced stability.
For a more additional updates, make sure to follow me on various platforms:
📺 Watch my previously deleted YouTube video on my Rumble Channel:
https://rumble.com/c/c-2287680
💬 Join my Telegram Group for discussions and updates:
https://t.me/joinchat/baUylmF-jR04OTI0
📢 Stay updated with my Telegram channel:
https://t.me/terachar134
🔖 Follow my blog for more tech insights and tutorials:
https://bit.ly/43zBY3j
📱 Connect with me on WhatsApp:
https://chat.whatsapp.com/LFDI0Red604CVPDOInlbkN
📘 Like and follow my Facebook page:
https://www.facebook.com/135tech
🎥 Subscribe to my YouTube channels:
- 13 Tech: https://youtube.com/@13tech
- 12_5 Tech: https://youtube.com/@12_5tech
- 13_3 Tech: https://youtube.com/@13_3tech
-
Hashtags:
#HTTPCustom #UDPConnection #UDPSettings #OptimizedConnection #TechTutorial #Networking #EnhancedBrowsing #InternetPerformance #TechGuide #ConfigurationTutorial


0 Comments