
Introduction:
In the world of VPN customization, there's a fantastic way to add a touch of personalization to your HTTP Custom settings. By incorporating custom colorful banners, you can make your browsing experience not only secure but visually appealing too. In this article, we will walk you through the steps of creating and adding these vibrant banners to your HTTP Custom app. Let's dive in and unlock a world of colorful possibilities! 🌈

Section 1: Creating Colorful Text 🎨
To get started, we'll first create the colorful text that will serve as our banners. Follow these steps:
1. Open any browser and navigate to the website patorjk.com.
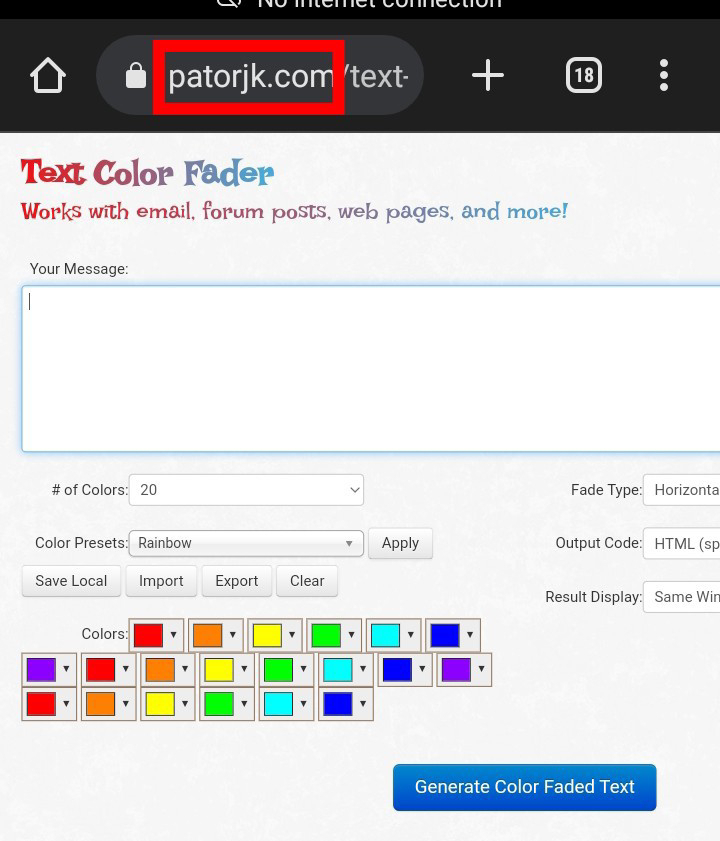
2. On the homepage, you'll find an input text area. This is where you can enter the custom text you want to colorize.

3. Explore the various options available, such as choosing the number of colors and other formatting preferences. And Put Custom Text.Once you're satisfied with your colorful text creation, click on the "CREATE" button.

4. To select the entire text, simply click on "SELECT ALL." This will highlight the entire text.

5. Copy the colorful text to your clipboard. You're now ready to add it to your HTTP Custom settings. 📋

Section 2: Adding Colorful Text to HTTP Custom 💻
Now that you have your colorful text ready, let's proceed with adding it to your HTTP Custom app:
1. Launch the HTTP Custom app on your device.
2. Make sure you have an unlocked file already loaded in the app.

3. Click on the plus icon within the app interface to create a new configuration.

4. Select the "SAVE CONFIG" option, which will present you with a list of configuration settings.

5. Give your configuration a name and check the boxes for "LOCK ALL," "NOTE," and "CUSTOM SERVER MESSAGE."

6. Enabling the "NOTE" and "CUSTOM SERVER MESSAGE" options will open a text box. Paste the colorful text you copied from earlier into this text box.

7. Save the file to apply the changes to your HTTP Custom settings.

8. Click on the plus icon again, but this time choose the "OPEN CONFIG" option.

9. Locate and select the previously saved file from the HTTP Custom folder.

10. Once the file is loaded, you'll notice the colorful text displayed in the "NOTE" area of the app.

11. To initiate the VPN connection, simply click on the "CONNECT" button within the app interface.

12. Upon establishing a successful connection, you'll be greeted with the colorful server message, indicating your custom colorful banners are now active. 🌐

Conclusion:
Congratulations! You have successfully enhanced your HTTP Custom experience by adding custom colorful banners to your settings. Enjoy the vibrant visual display as you browse the web securely. Don't forget to explore other customization options within HTTP Custom to further personalize your VPN experience. Stay tuned for more exciting tutorials and updates. Happy browsing! 🎉🔒🌐
Follow me for more updates on:
🔔 Rumble Channel (watch my previously deleted YouTube video here): https://rumble.com/c/c-2287680
📢 Telegram Group: https://t.me/joinchat/baUylmF-jR04OTI0
📺 Telegram Channel: https://t.me/terachar134
🌐 Follow on Blog: https://bit.ly/43zBY3j
📲 WhatsApp: https://chat.whatsapp.com/LFDI0Red604CVPDOInlbkN
👍 Facebook Page: https://www.facebook.com/135tech
🎥 YouTube 13 Tech: https://youtube.com/@13tech
🎥 YouTube 12_5 Tech: https://youtube.com/@12_5tech
🎥 YouTube 13_3 Tech: https://youtube.com/@13_3tech
Stay connected and never miss an update! Subscribe and join me on these platforms for exciting content and tutorials. Don't forget to hit the notification bell to stay updated with the latest uploads. Let's explore the world of technology together! 🚀✨


0 Comments